

The inspection contingency (aka investigation of property) is a clause in the residential purchase agreement that allows you to conduct inspections of the property berfore finalizing the purchase. This protects you by giving you the opportunity to find any serious problems with the property that may cause you to change your mind about buying the house.
It's true that inspections require you to put in a little more work, but it doesn't have to be a dreaded task. With a few tips and the right process, you can take the inspection process from a necessary evil to a big money-saver.
That's great news since lots of people rely on inspection rights to get a better understanding of the home they are about to buy. Without it, you can expect hidden defects and other unknown problems with your purchase.
With a little planning (and a helpful guide 😉), you can identify all the repairs you will need to make to the house and get paid to make those repairs.
Here is my process for handling the inspection process:
After signing the contract, you should schedule inspections as soon as possible because there is a deadline by which you have to complete the process.
The most common inspections are a home inspection, roof inspection, and pest inspection. I recommend being extra thorough and ordering a sewer, chimney, foundation, HVAC, and electrical inspection.
You bear the cost of the inspection, but it's almost always worth the cost because you'll probably find something that needs to be fixed and get the seller to fix those things.
Also, this is the biggest purchase of your life and you need to know if there are any hidden dealbreakers.
Here is a real life example of the cost for a property we purchased last year.
| Type | Company | Cost |
|---|---|---|
| Home | LHS | $510 |
| Sewer | El Sobrante Sewer | $231 |
| Pest | Charlie's Termite | $250 |
| Chimney | Grady | $225 |
| Foundation | FDRW | $550 |
| Roof | Walnut Creek Roofing | $225 |
| HVAC | Clean Air HVAC | $125 |
| Electrical | Omo's Electric | $150 |
| Total | $2266 |
Although the inspector will typically give you a written report, you should be at the property in person so you can talk to the inspector and ask any questions. Here's a real life example why:
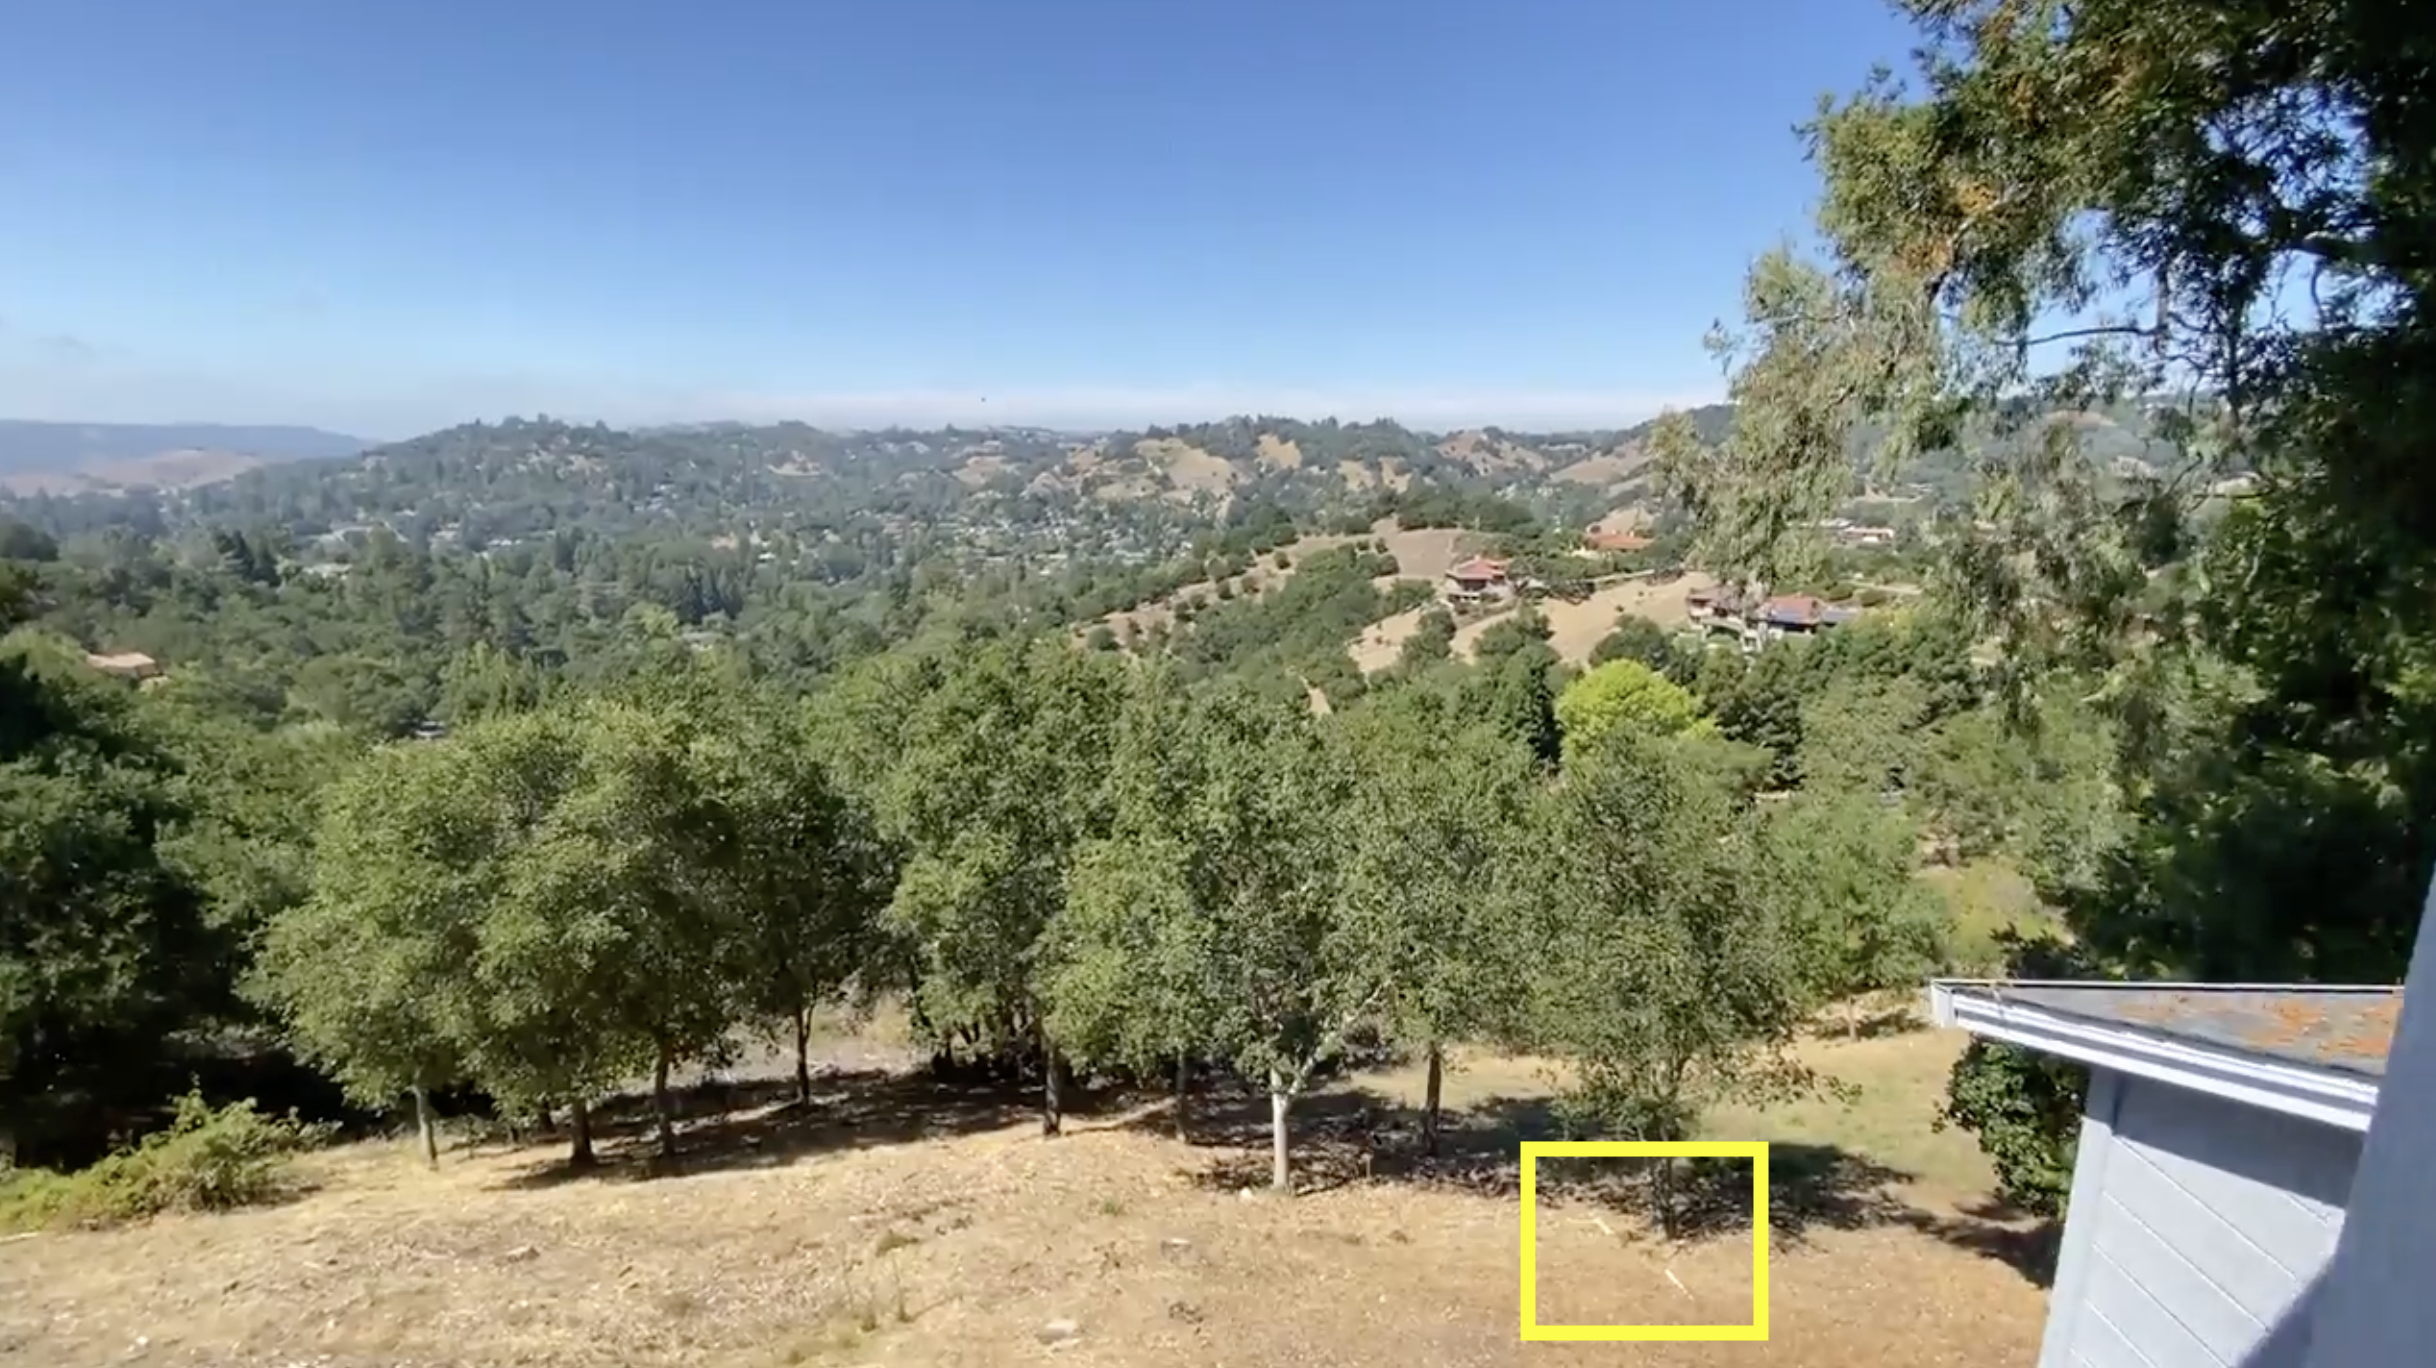
When we first started house hunting in the San Francisco Bay Area, we found this house on a mountain ridge with amazing views. We fell in love with the property, made a bid, and got a signed contract.
We hired a foundation inspector and while we walked the property, he pulled me over and told me about the white pipes sticking out of the hill. I noticed them before but thought nothing of it. It turns out those pipes were installed for drainage after a previous landslide!
You should read your inspection reports but don't be scared if you get a long report. It’s your inspector's job to find as many problems as possible.
Our home inspector recommended that the red “Action Items” are the things we should take care of immediately while blue “Consideration Items” are things that you can take care of later.
As soon as you get your inspection reports, ask contactors for estimates to fix any issues. Your inspector will usually be able to refer you to a contractor. It doesn't cost anything to get an estimate, and those estimates will help you ask for a price reduction.
Having a contract you can trust is essential, but you are ultimately responsible for doing the work to present a clear itemized list justifying the costs of repairing the issues.
If you choose to walk away, the sellers may be required to disclose the discovered issues to future buyers, so they have some incentive to negotiate.
Let’s go back to the example above where I found out about the landslide repair in the back yard. This made me worried about the foundation of the house.
But mentally I found it very difficult to change my mind on a house that I bid on, won the contract for, and started thinking about as my home.
However, with storms becoming increasingly severe, I didn’t want to be worried about landslides every time we had a big storm.
After talking with family, we decided to cancel the contract. If you find yourself in a similar situation where you discover a deal-breaker, see below for how I filled out the cancellation.
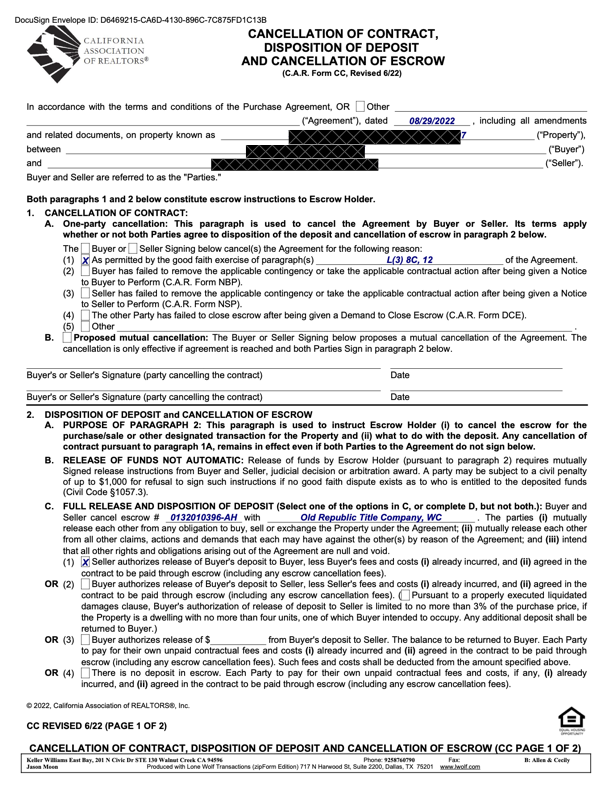
I added "L(3) 8C, 12" because that was the section of the residential purchase agreement that gave me the right to cancel under the "Investigation of Property" contingency.
Add the title company that serves as your escrow agent. A full release means that you will get your full deposit back.
If you find some issues with the home but nothing major that makes you want to back out of the deal, you can ask that the seller make repairs.
However, I usually don’t recommend this approach because the seller is not incentivized to do a great job on the repairs.
It’s better to take option C to get money from the seller so you can do repairs yourself after closing.
The last option is to ask the seller cover the cost of repairs.
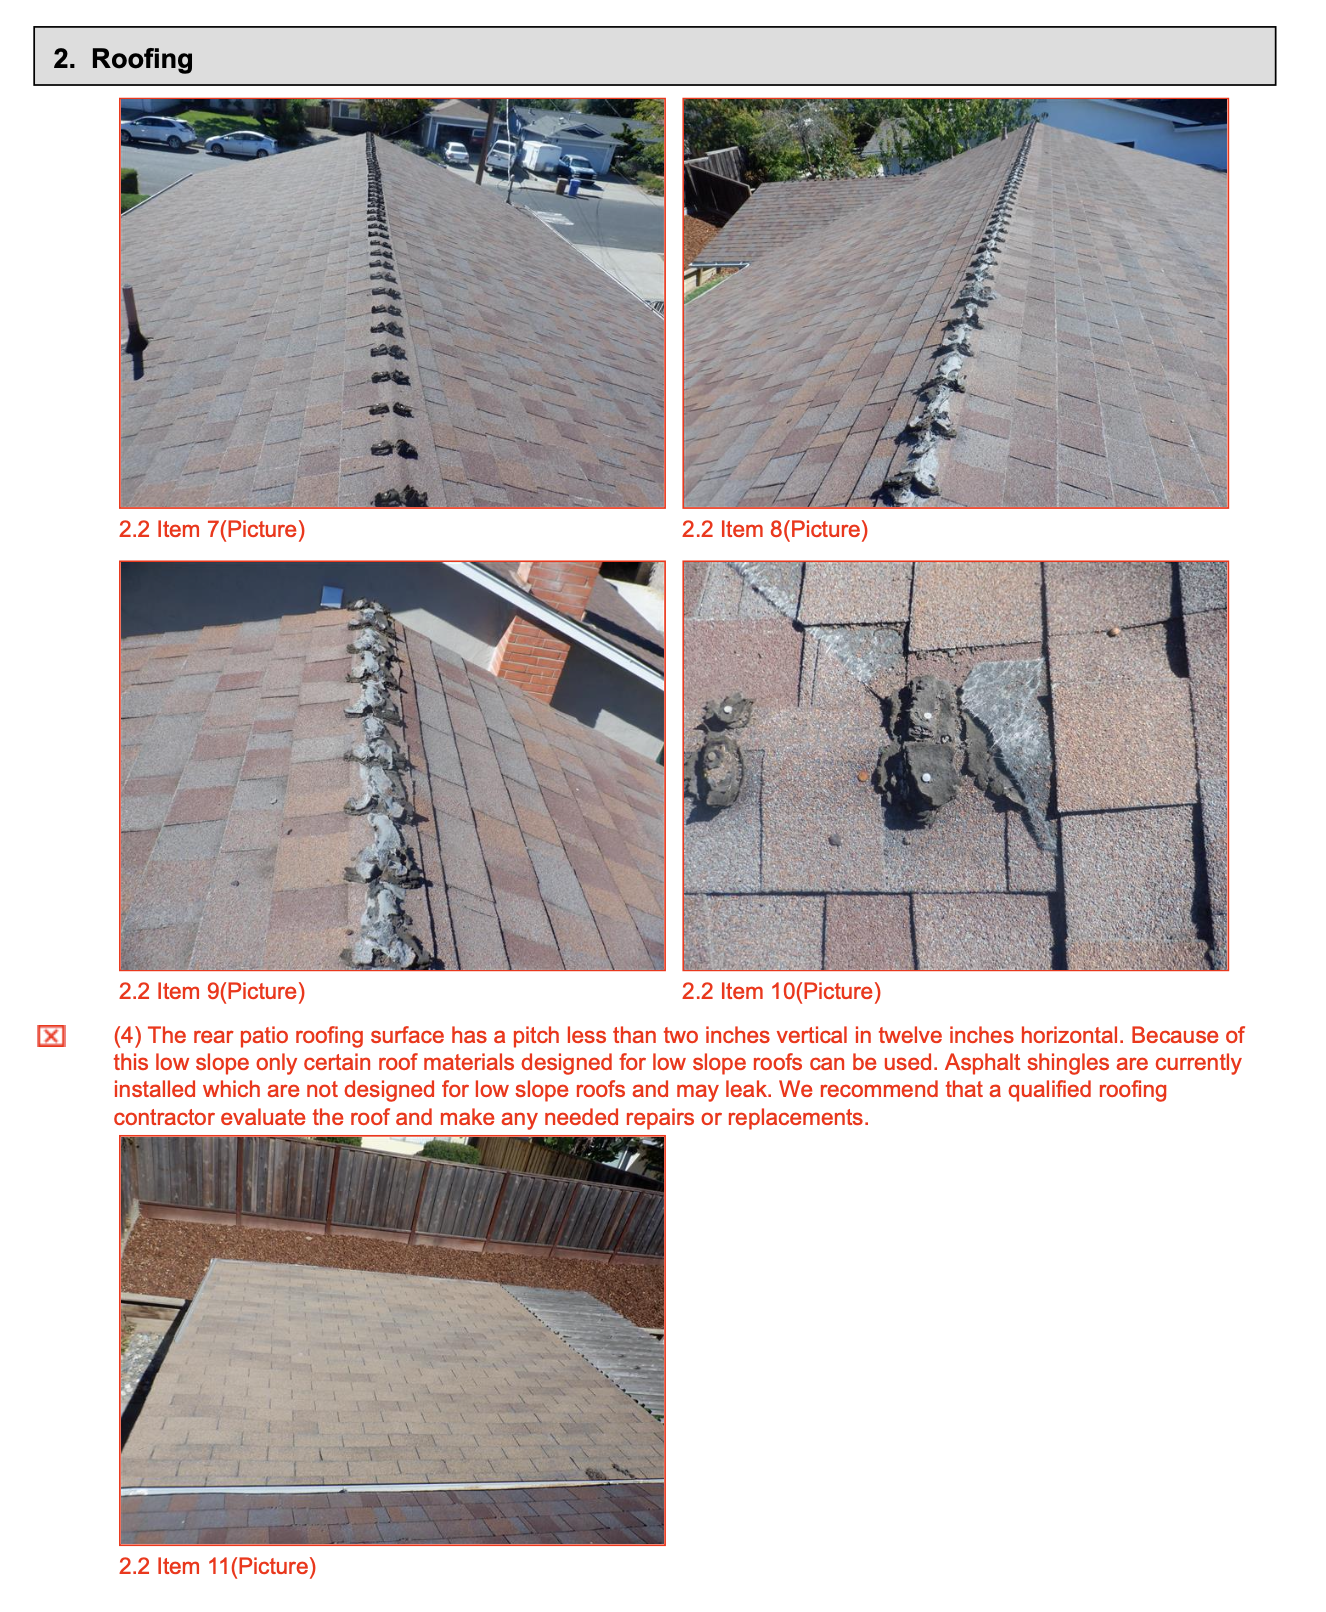
For the house I purchaesd last year, I found a number of defects that showed the house was in much worse shape than a reasonable person would expect.
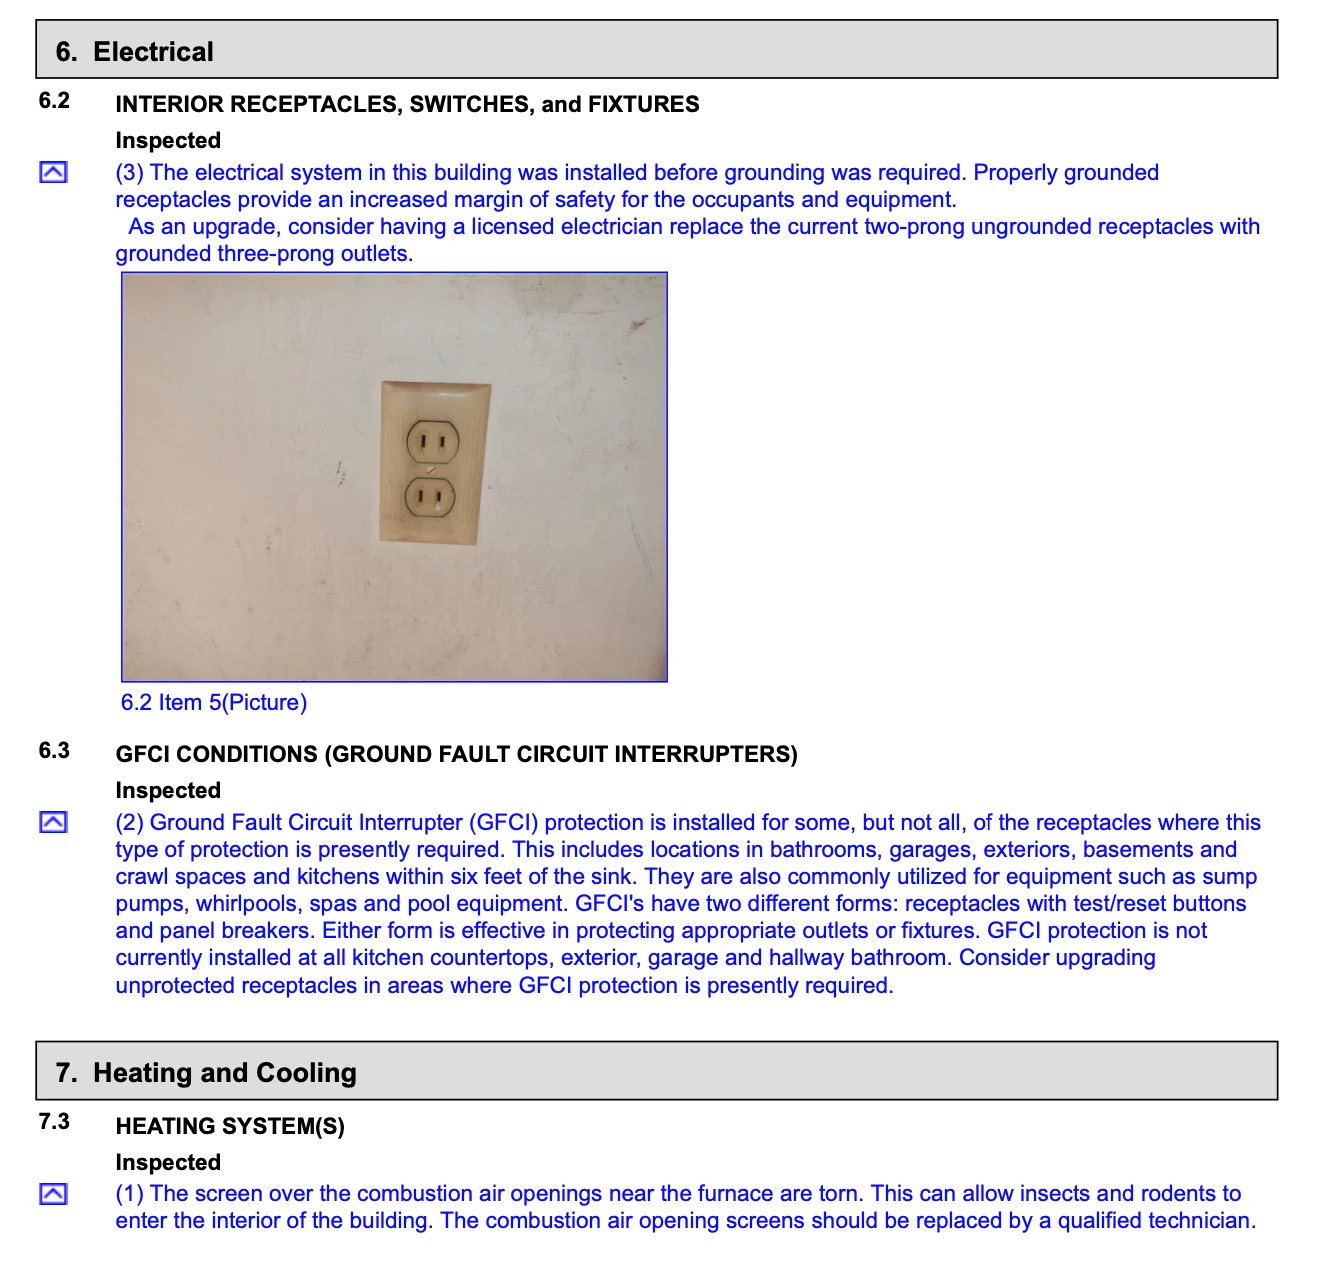
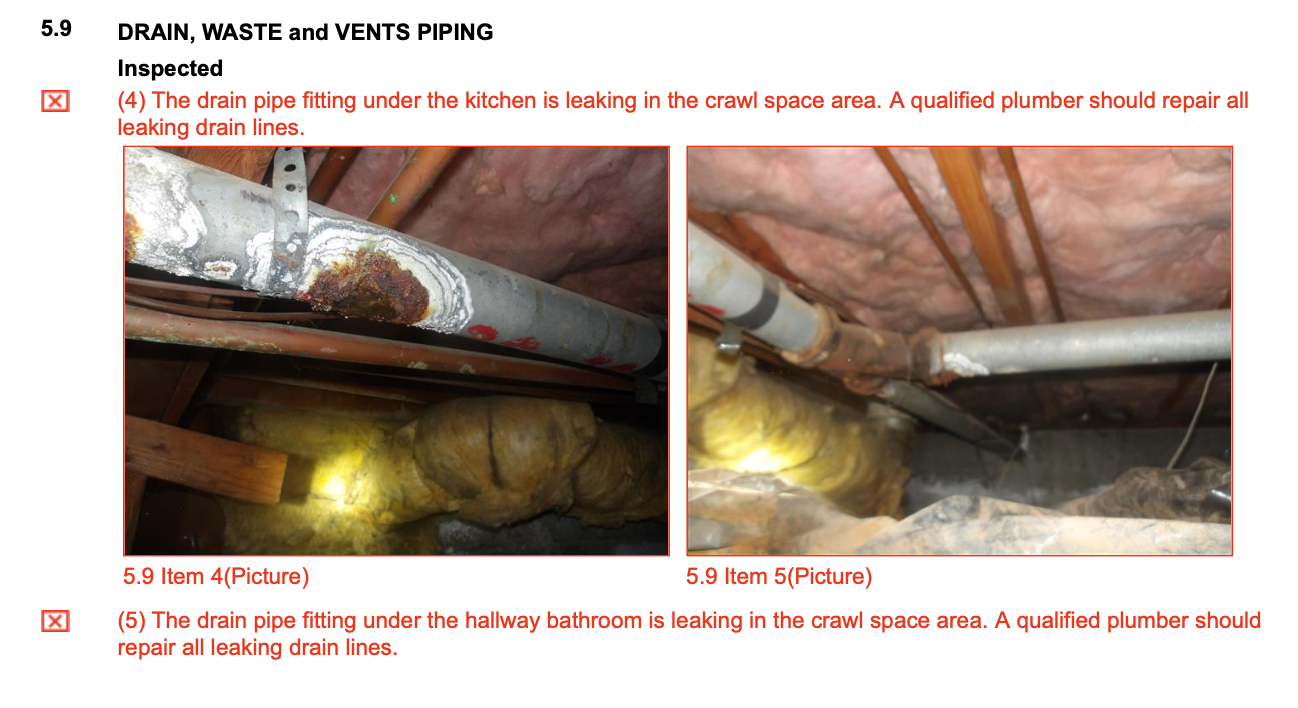
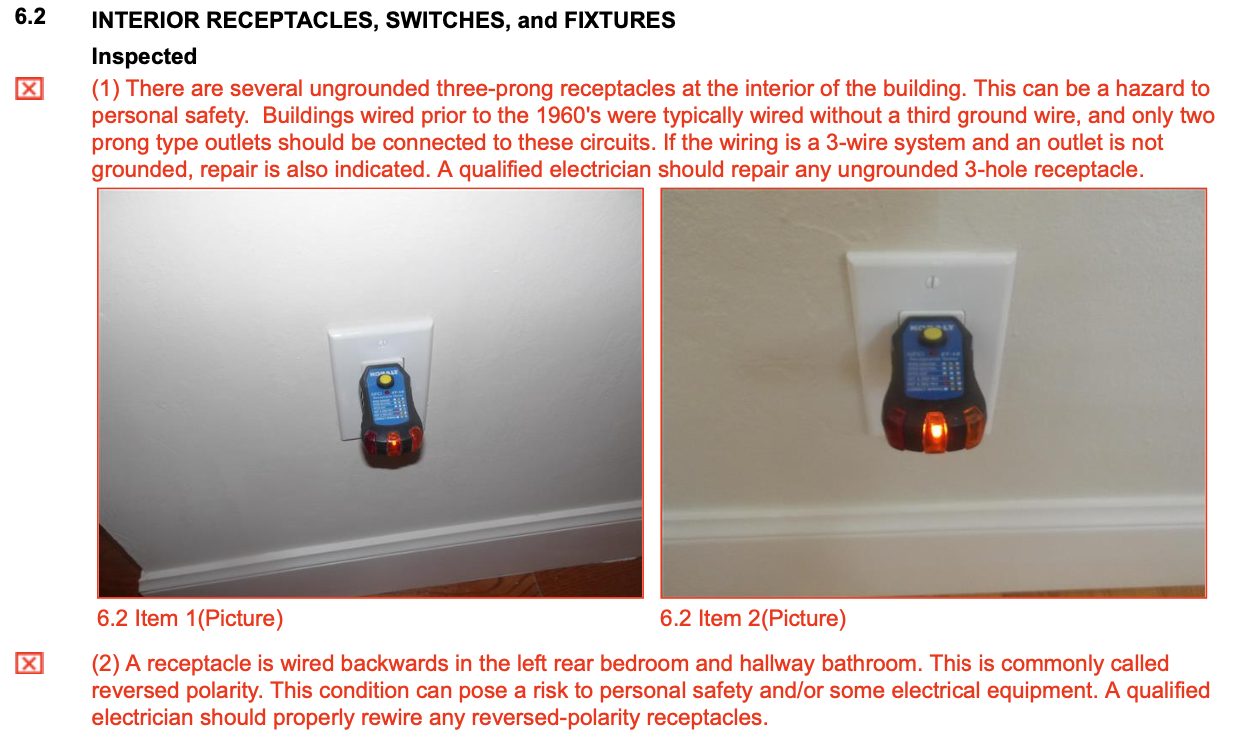
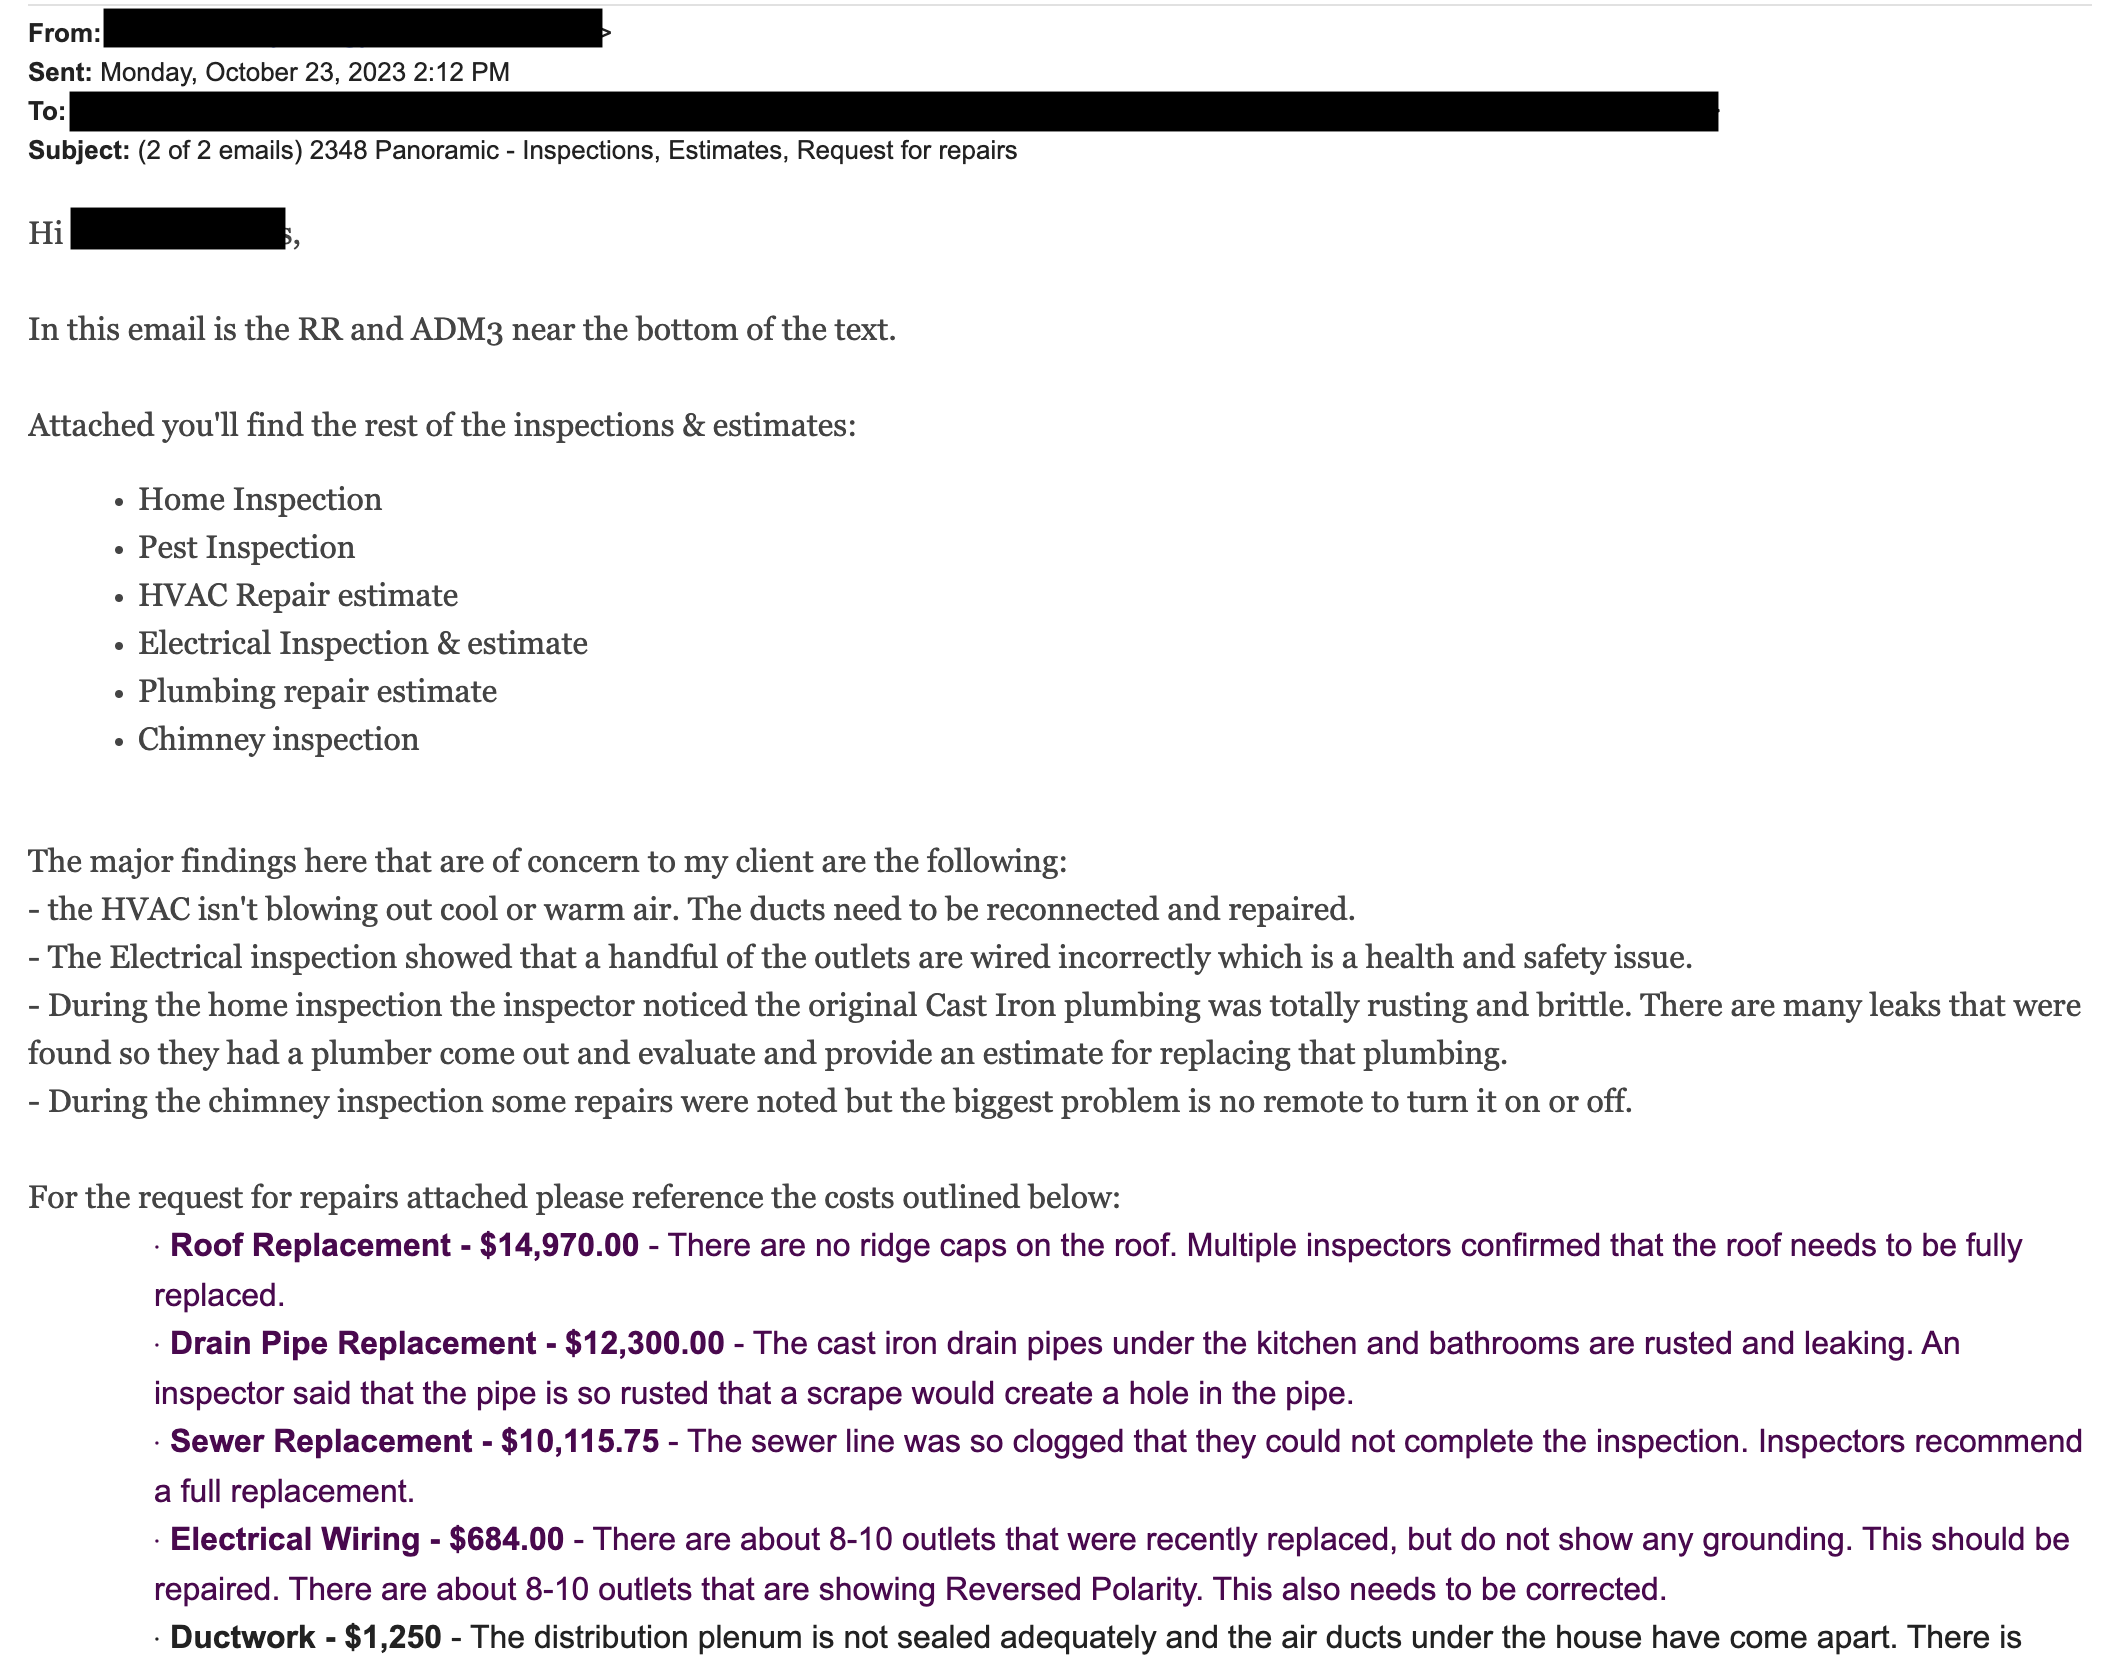
Here are some things that I discovered. For example, I could not have known that the pipes in the crawl space were rusted out or that the 3 prong receptacles were not actually grounded.
One of the inspectors told us that this contractor has a reputation for doing some shoddy cosmetic work right before a sale. This is why it's helpful to chat with the inspector.
The sewer drain pipe was about to break from rust. Inspector said if he scraped the pipe with a screw driver, it would have created a hole.
Some electrical receptacles looked to be 3 hole receptacles but they were not properly grounded. They were just 2 prong receptacles with a third hole. Some receptacles were wired backwards.
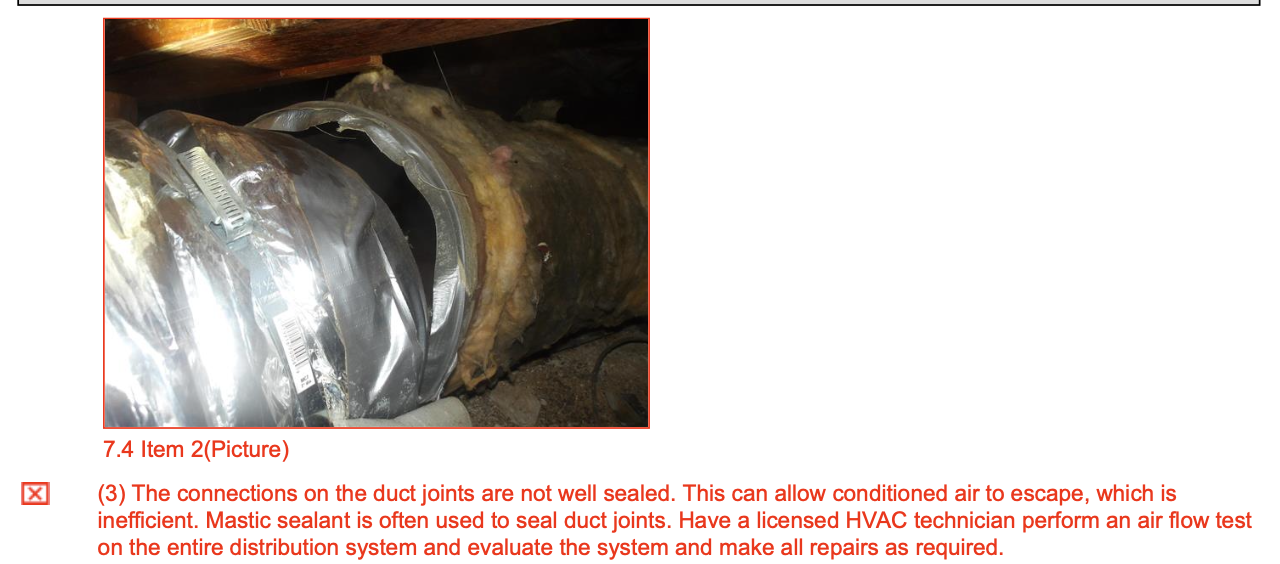
Some of the air ducts were totally disconnected. Basically, we were heating the crawl space more than the house.
It’s really important that you schedule the inspections as soon as possible because you need to leave time to get quotes for any repairs. With quotes in hand, you are signaling that you legitimately need to and will make these repairs after closing.
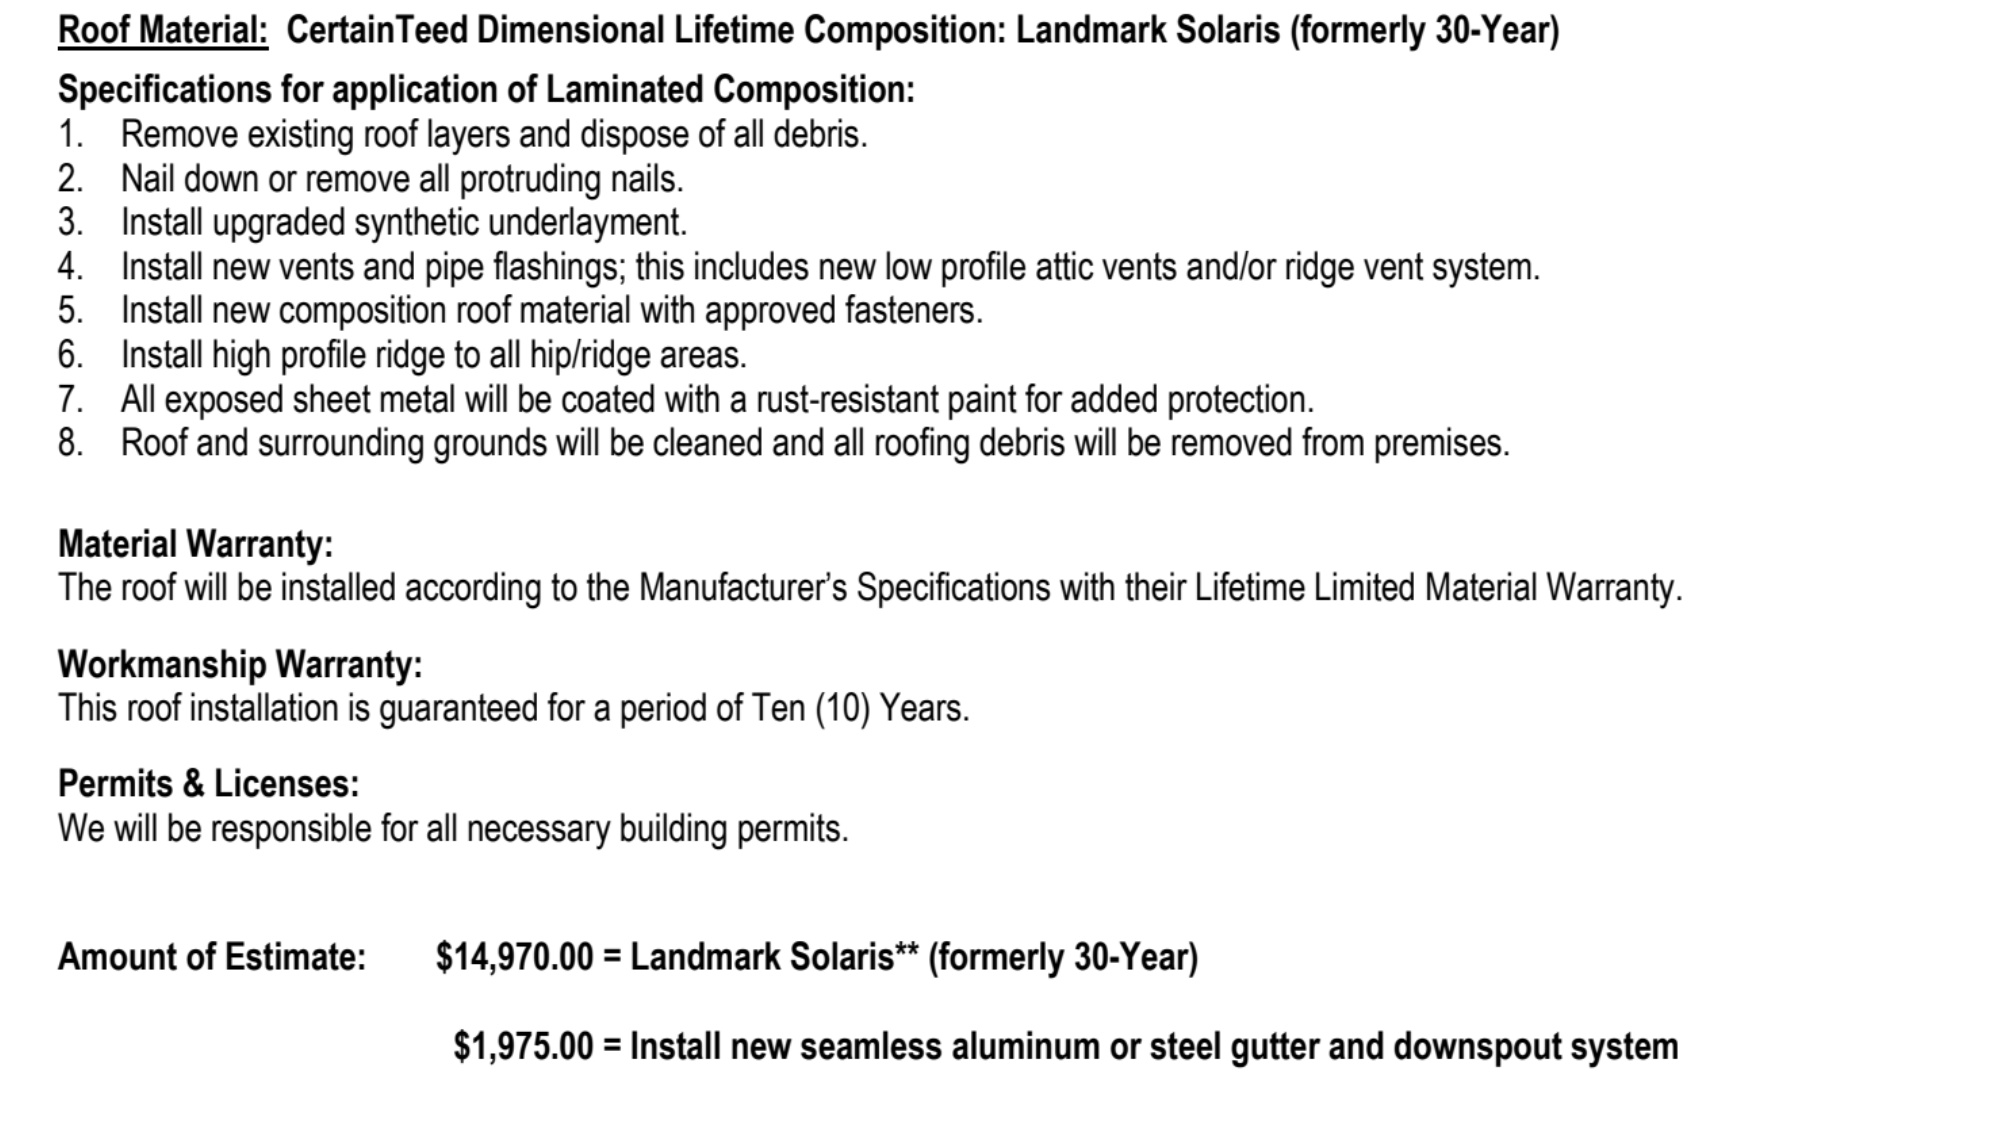
After receiving the inspection reports, I got some quotes to fix the problems noted in the reports. This was the quote for a new roof.
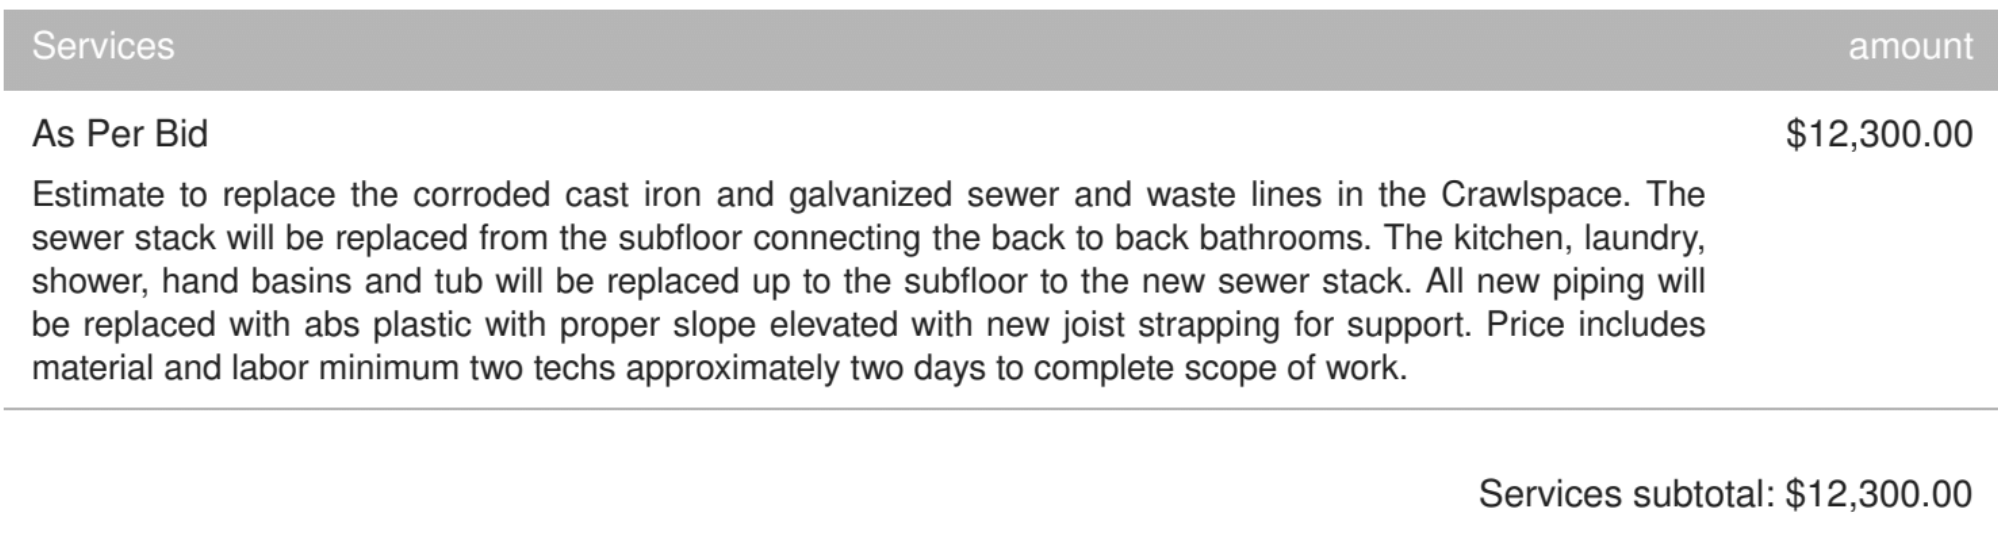
This was the quote to replace the rusted pipes under the house.
After reviewing the inspection reports and getting quotes for the repairs, this is the summary email I sent regarding the request for concessions.
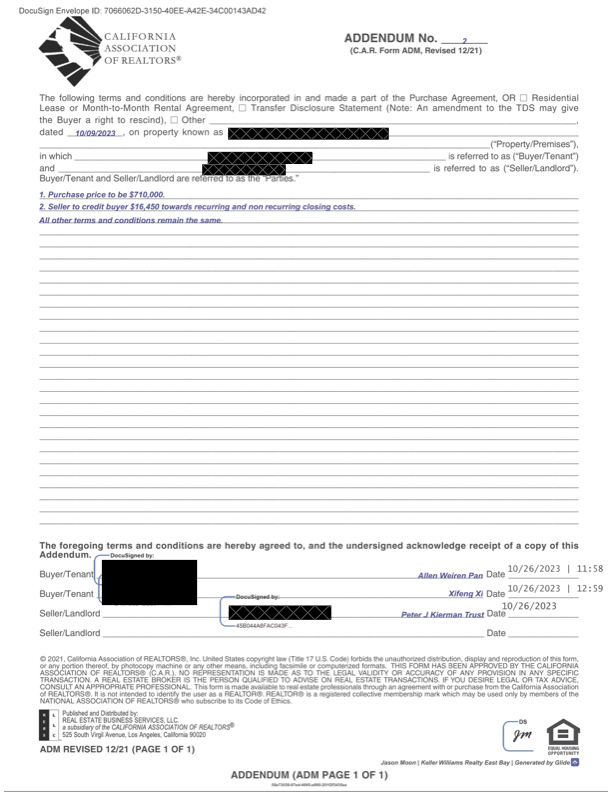
The original purchase agreement was $735,000. I requested a concession of approximately $60,000 to cover the repairs needed for the house. The seller agreed to concession of about $40,000. I've never gotten 100% of the of the requested concession, but I have usually gotten more than 50%.
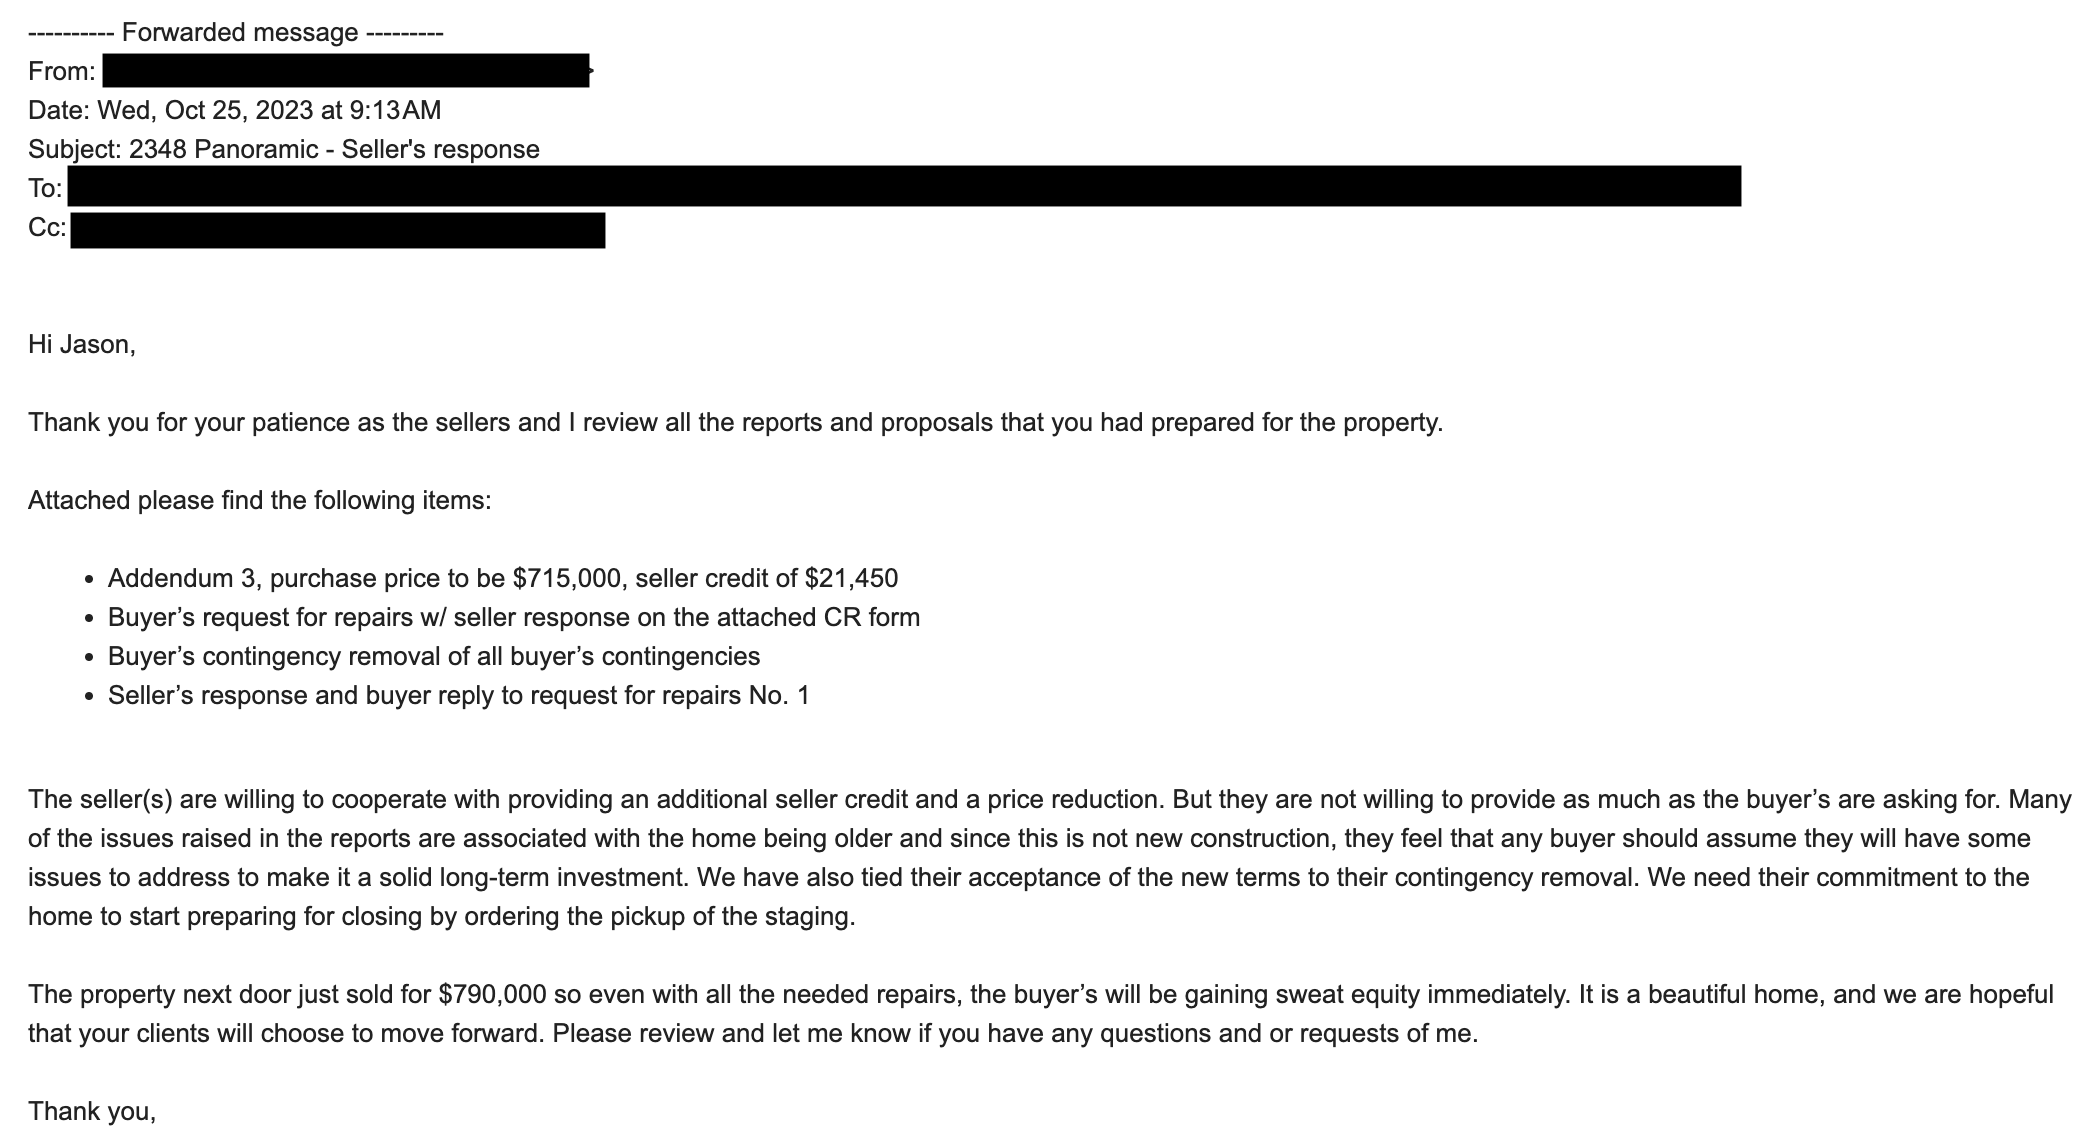
I papered the concession by signing an addendum to the purchase agreement. The seller did not have to come out of pocket for the costs because I just reduced the purchase price by $25,000 and had seller provide a $16,450 credit towards my closing costs.